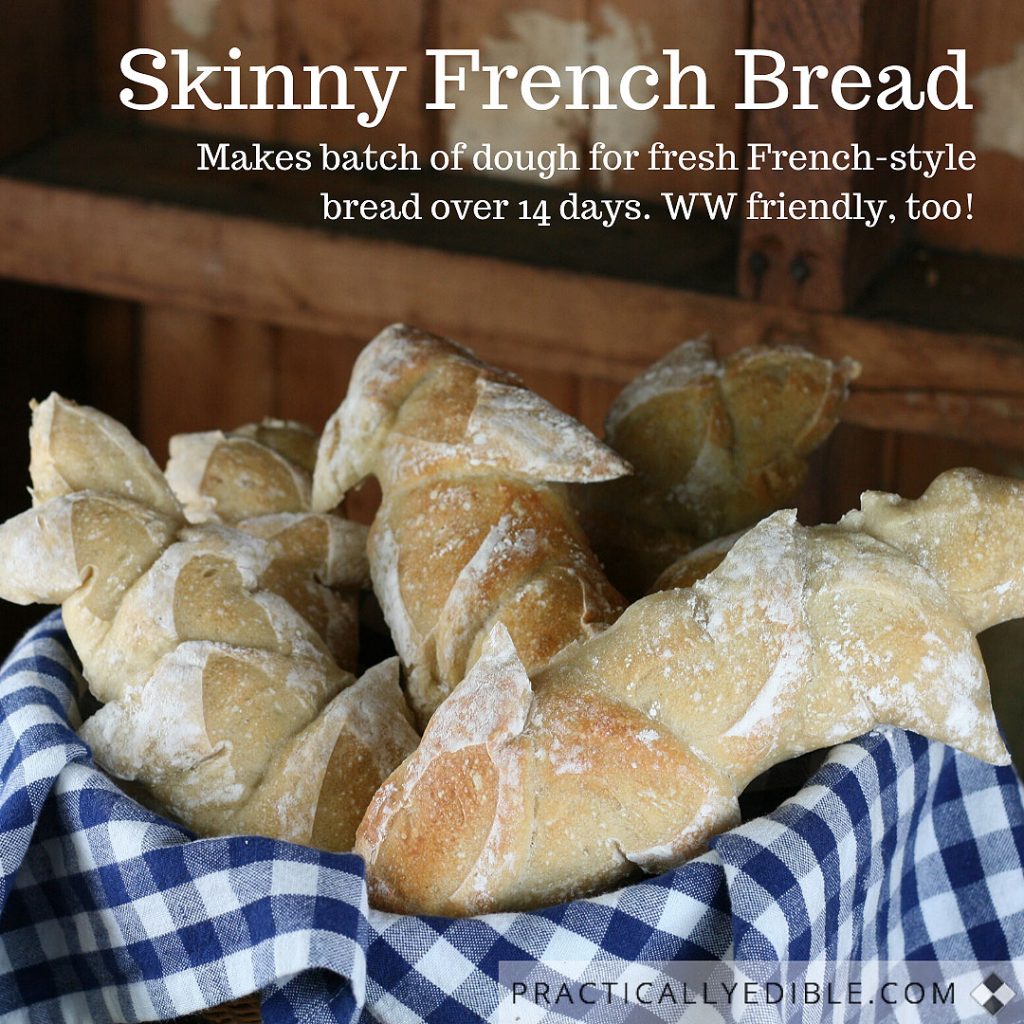
Skinny French Bread – Pain Epi (wheat stalk bread)
This crispy bread is delicious and dead easy to make. You let the bread machine mix up a batch of dough, and store the dough for up to 14 days in the fridge in a sealed plastic container. Then, on the days when you want some bread, you cut off a small portion of the dough, let it rise, then bake it, so it’s only taken 5 minutes active time out of your day for hot French bakery quality bread fresh in your kitchen, for pennies. It makes small loaves, perfect for one or two people, though you can always bake several loaves at the same time.
And incredibly, it’s relatively non-fattening compared to many other breads. But first the recipe.
Bake at 230 C / 450 F. Makes 8 x 250 g / 1/2 pound loaves.
These directions work for bread machines of 900 g (2-pound) loaf capacity and up. You could also do this in a large stand mixer.
Ingredients
- 750 ml (3 cups / 1 1/4 imperial pints) barely warm tap water
- 1 1/2 tablespoons yeast (2 packets)
- 2 teaspoons salt
- 900 g (6 1/2 cups / 2 pounds) bread flour
Instructions
Making the dough in a bread machine
- Put the water, salt, yeast into the metal bread machine pan. Stir to mix with a plastic or wooden spoon or spatula.
- Add the flour about 1/4 at a time. With a plastic spoon or spatula, or with your hands, stir to give the flour a head start at mixing in. Don’t worry about lumps; the paddle with deal with them. Just moisten all or most of the flour so it doesn’t fly out of the bread pan when mixing starts.
- Set on dough cycle; start, and let it complete entire dough cycle including the rise. If the dough seems too dry for the paddle, add water a teaspoon at a time.
OR Making the dough by hand or in a stand mixer
- Put the water in a very large bowl. Add the salt and the yeast, and mix.
- Add the flour a portion at a time. Mix well. If mixing with a spoon manually, you may need to use your hands to coax the last flour in. Knead well if doing by hand, or if using a stand mixer, let it do the kneading.
- Cover the bowl with a tea towel; let rise two hours.
Resting the dough
- Put the dough in a large covered container in the refrigerator.
- It is best to let it sit overnight before using. You can store in refrigerator up to 14 days. It develops a bit of a sourdough tang as it ages.
- The dough is easier to work with when it’s cold because it is a sticky bread dough.
Baking the bread
Making the shape is actually very easy. You will get the hang of it quickly. You just need a pair of scissors. You can make as many loaves at a time as you wish — leave about a hand’s width between each strip of dough.
- Cover a baking sheet with parchment paper or greaseproof paper (Tip! Don’t used WAXED paper; the bottom of the bread will stick to it like crazy after baking.)
- Sprinkle a work surface with a bit of flour.
- Take 150 g to 250 g (5 to 8 oz) of dough, stretch it out in a baguette shape until it’s about 3 cm (1 1/2 inches) across.
- Put on the prepared baking sheet.
- Let rise about 40 minutes.
- Turn oven on to start heating to 230 C / 450 F. Raise the rack well above any heating element so the bottom of the bread won’t burn.
- At the same time, put an empty metal pan such as a cake pan or a broiler pan in the oven to heat. This is going to get some water in it.
- Then, make the points on the risen dough. Start by cutting with a pair of scissors into the end of the strip of dough. Cut in on a 45 degree angle, and cut in about 5 cm (2 inches) deep into the dough but do not cut all the way down through to the bottom of the dough. Take the piece you have partially severed and lift it off to one side. Now, partially sever another piece from the end in the same way, but lift it off to the other side. Continue until you have got through to the other end. (See 20 second video below)
- Dust lightly with flour.
- Put about 250 ml (1 cup — doesn’t matter exactly how much) of very hot water from the tap or kettle into the heated metal pan in the oven. This will steam the oven. Put the baking sheet with the bread dough in right away and close the door.
- Let it bake for about 25 minutes or until it is browned and crisp and it sounds hollow inside.
- Drag onto wire rack, paper and all, to cool.
NOTES
- The recipe makes a total of 1.9 kg (4 lbs / 3 oz) of dough.
- If you’re in Canada, owing to the quality of Canadian wheat you don’t need special bread flour, you can just use all-purpose. Elsewhere, if you want to use all-purpose, use 1 kg / 7 cups / 2 1/4 lbs of all-purpose. In the UK, don’t use plain flour, you’ll need bread flour;
- Try to use an un-iodized salt because the lack of iodine lets the yeast rise way better because iodine kills yeast .
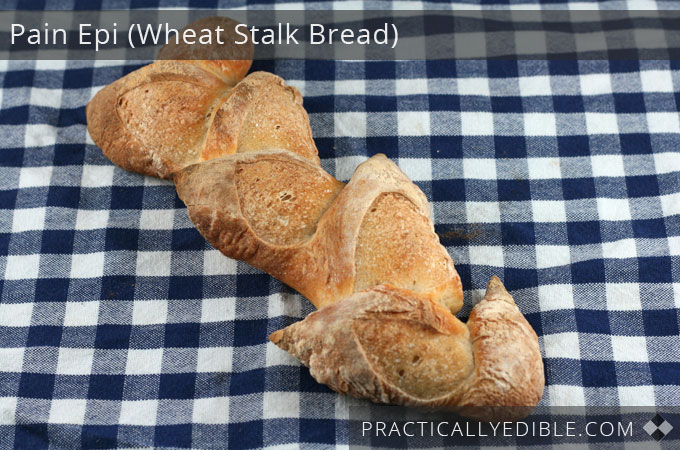
This classic French bread, Pain Epi (meaning “wheat stalk bread”) ultimately hails from a book called “The New Artisan Bread in Five Minutes a Day”, by Zoë François and Jeff Hertzberg.1 The shape of this bread is designed to expose a large amount of the bread surface to make a very crispy crust. You tear the baked bread off in pieces that naturally break off according to the design of it.
I made it healthier by lowering the salt in it, and I adopted it for the bread machine.
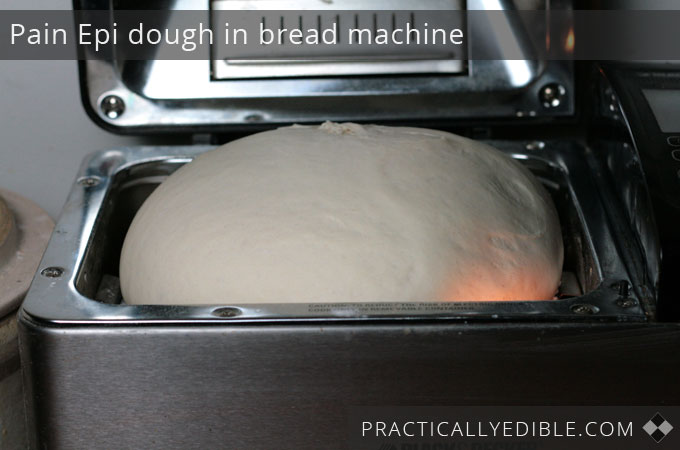
I let my 900 g (2-pound) loaf bread machine mix the dough on its full 1 1/2 hour dough cycle which includes a rise in the bread machine under perfect temperature and humidity conditions. This bread machine pan is just big enough to handle the quantity of dough, though it does want that head start of manually mixing the flour into the water, and perhaps a stir a time or two after that during the mixing to make sure it’s all mixing nicely.
This particular Black & Decker machine is a beast and handles the load quite nicely, but if you sense yours straining I’d stop it — it wouldn’t be worth a burnt-out motor. It really does fill my machine by the time it’s mixed and had its first rising in the machine — you wouldn’t want to double the batch, that’s for sure! (My bread machine has a built-in light – that’s what the demon glow in the corner is! And the machine is not usually that clean — I cleaned it up in horror after I looked at it through a camera lens!)
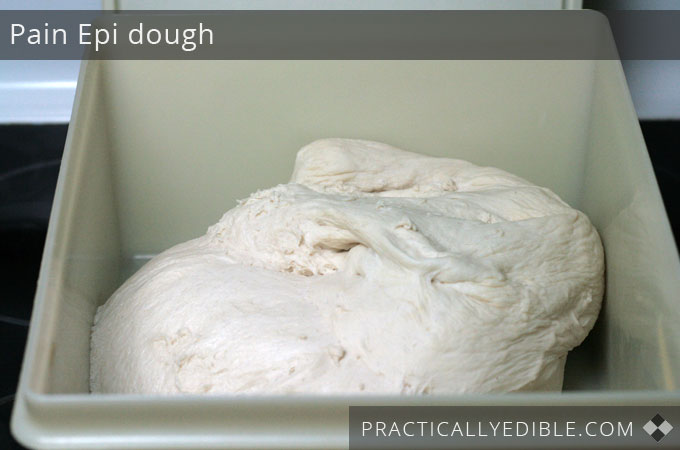
The bread really does taste better as the dough ages in the fridge — I keep it refrigerated in a large, square 1960s era Tupperware container with a lid, the kind that has seen a million cakes, breads, and batches of rolls in it over the decades (there is no need to spray or grease the container).
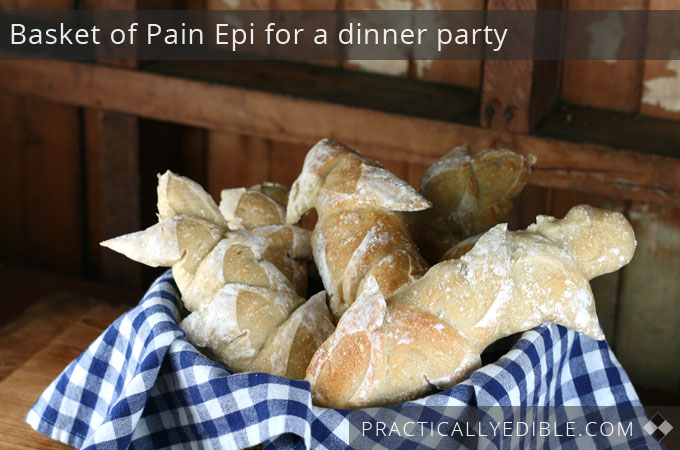
You could consider making a basket of these dramatic-looking breads to put out on the table for a dinner party. They’re ideal in a way because the dough is best made a few days ahead of time. Use about 150 g (5 oz) of bread dough per loaf, or maybe less, and make small ones. On the day of, just form, rise, snip and bake.
There are several things that make this bread qualify as “skinny” in my mind:
- There is no sugar in the recipe at all;
- There is no fat in the recipe at all2;
- The loaves are small, so there’s built-in portion control (which is good because otherwise you so could not stop eating this bread);
- The recipe, and this is the particular brilliance of it, is designed to supply you with these freshly-baked loaves over a period of days. So you can enjoy artisanal bread in perfectly manageable quantities in your daily life over a period of time and don’t have to eat it all at once while it’s still fresh;
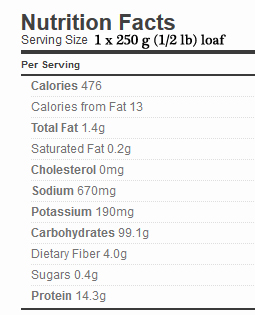
- You’re going to end up with loaves that are about 20 cm (8 inches) long, about 5 cm (2 inches wide), and wonderfully satisfying in their texture and crispness, and fewer calories than 4 slices of a grocery store white bread such as Wonder Bread.
- 7 x 270 g loaves = 476 calories per
- 8 x 240 g loaves = 416 calories per
- 12 x 150 g loaves = 277 calories per
____________________________________________
* PointsPlus™ calculated by PracticallyEdible.com. Not endorsed by Weight Watchers® International, Inc, which is the owner of the PointsPlus® registered trademark.
They call it “pain d’epi but that makes no more sense to a French ear than “pain de baguette” would. You would actually call it instead “pain en épi”, or “pain épi”, or, in a French bakery, you could just ask for an “épi” the same as you would a “baguette.” ↩
I realize that most breads in France typically are only made from flour, yeast, salt and water, anyway. But, that’s very unusual for breads in the English-speaking world, so being sugar and fat-free already gives these breads an easy step up by being lower in carbs, and fat-free to boot. ↩


hi,
Lovely site you have, and fantastic picture illustrations…. Definitely almost edible, I have to refrain from biting into my screen 🙂
Just wanted to let you know (I am French so feel obliged to let you know – I think that’s why we’re called ‘arrogant’ but it’s realkly out of kindness and because I like your site I’m giving you the info, please, don’t be offended 🙂 )
The bread is indeed made in the shape of a wheat stalk, and if you ask for it in a bakery, you’d ask simply for ‘un épi’. However, it is not ‘pain d’épi’ but ‘pain en épi’ – it is a short for ‘un pain en forme d’épi’ (in the shape of); there is another french speciality which is called ‘pain d’épice’ – often translated, incorrectly, as ‘gingerbread’ – and I think there may have been a little merging of the two…
Actually, if you EVER discover the still well guarded secret of making the traditional ‘pain d’épice’ I would probably marry you!!!!
take care, and keep up the good work – hope you’re not offended 🙂
Bonjour Karen, merci pour votre conseil concernant le pain épi!
You are right, it turns out it is called “pain d’épi” only by English-speaking web sites, and some English-speaking authorities on French bread. I picked up that incorrect terminology from them, and as French is a second language for me, I don’t always have the “ear” to detect right away what sounds right. I’ve chatted with some French-speaking friends and they suggest that “pain épi” might even be better than “pain en épi”, what do you think?
I will research pain d’épice one day!
As a retired baker, this is real bread! No preservatives, hard as a rock by the end of the day, crusty, I can’t count how many loaves I have made over the years! Best sandwich bread ever! Grandpa